Monday, March 31, 2014

UCET 2014


The annual conference for the Utah Coalition of Educational Technology gets under way this week. This is the largest technology conference in the state and has been around for over 30 years. Check out the schedule and sessions at: http://ucet2014.sched.org. Teachers from every school district join to learn about or present on using technology in the classroom. There are sessions on iPad, Canvas, BOYD, iMovie, Photoshop, Evernote, Google drive, and many more. If you have never been, this is the year to go! Let me list for you a couple of reasons:

  1. This is not a conference for geeks. Though many of us there may proudly say we are a little geeky, this is a conference about teaching and learning and how to best use technology to improve both.
  2. For the first time, the conference is offering a one day price. Attend either Thursday, April 3rd or Friday April 4th for only $50. Both days for $70.
If you attend one or both days I guarantee you will walk away with a new idea or way to engage the learners in your classroom. 

We in the Education Technology Department have worked really hard to encourage as many Canyons School District teachers to attend UCET as possible. For those that are attending, you are in for a treat. A keynote each day, sessions that promise to enlighten you and give you something you can use when you return to your classroom, and possibilities for winning prizes. 


Please remember to take a moment to print your badge before you go. It will get you through the lines faster, and you will be ready to go when you get there. Instructions can be found on the Info tab at http://sch.ucet.org.

Build your own schedule using the web app, or Android and iPhone app found at http://sch.ucet.org. Then use your device to navigate to your sessions. Go totally paperless for this event!
Check out the 2 videos from last year on how to use Sched!




World Backup Day

Today is world backup day. It is the day to remind ourselves to back up our drives and take precautions to make sure we don't lose valuable data.

A backup is a second copy of all your important files — for example, your family photos, home videos, documents and emails.
Instead of storing it all in one place (like your computer), you keep another copy of everything somewhere safe. Remember, it is just not your computer that you need to worry about, it is your phone, and your tablet device. Make sure to back them all up.

Here is some data from the world backup day site.
  • 30% of people
    have never backed up 1 time
  • 113 phones
    lost or stolen every minute 2
  • 29% of disasters
    are caused by accident 3
  • 1 in 10 computers
    infected with viruses each month 
These are just some of the ways that you could lose valuable data, like pictures. You need to back up to other storage. 

This storage can be on additional drives or in what has been termed the cloud. There are many services available for cloud (online) based backup. The easiest way to backup is by obtaining a USB drive and then copying all of your important files to that. How many files you have and how big they are will determine the size of drive that you need, but you do need one. 

There is a saying, There are two types of people in the world, those whose hard drives have crashed and those whose hard drives are going to crash. A computer crash is very scary, but if you have a good back up, it is certainly less scary. 

This is a good article on some different ways to backup.


So happy World Backup Day. Now get out there and get your data backed up.


Friday, March 28, 2014

Raspberry Pi and Raspberry Jam


The Raspberry Pi, as yummy as it sounds, is not only a tasty dessert. It also is an easy way for student to create their own computer. The Raspberry Pi Foundation describes the device as "a low cost, credit-card sized computer that plugs into a computer monitor or TV, and uses a standard keyboard and mouse. It is a capable little device that enables people of all ages to explore computing, and to learn how to program in languages like Scratch and Python. It’s capable of doing everything you’d expect a desktop computer to do, from browsing the internet and playing high-definition video, to making spreadsheets, word-processing, and playing games." Are you interested?  Learn more at raspberrypi.org! Lesson plans, activities and other resources are already created to help teachers to get started at the Resource Center.

The PiHut sells the Raspberry Pi for right around $50 and has other kits and accessories you can purchase.  They can also be found on Amazon.com for a bit less.

Once you get started, you will become addicted, and once addicted you will want to learn more about the possibilities. And so, the Raspberry Jam was created for just those individuals. At a Raspberry Jam, you can join other like-minded people at a community event organized locally and designed to share information and engage participants in learning more about what the Raspberry Pi is capable of creating. More information about local Raspberry Jams will be available online this month at the Raspberrypi.org website!


Wednesday, March 26, 2014

Twisted Wave for Recording Audio on Chromebooks

Here's a great discovery that you can use with your students to record audio tracks on Chromebooks!  Check out www.twistedwave.com.

If you have ever used “Audacity”, the free open source software for recording and editing sounds, you will find this program very similar and just as easy to use.  Not only can you easily record an audio track of up to 30 seconds, but with TwistedWave you can also save the audio track directly to a Google Docs Account.  This is a fantastic student tool for fluency practice.

Getting started is easy, there is nothing to download or install.  Go to www.twistedwave.com and click the “Online” icon on the right side of the page.  Twisted Wave works great on Chrombooks, but it can also be used in Firefox, Safari, and Internet Explorer.


When you are ready to begin a recording, click the "New Document" icon under the introductory paragraph.

Clicking "New Document" will bring up a new window asking permission to access the microphone on your computer.  Click the "Allow" and the "Remember" check boxes to avoid seeing this request in the future.  You may also see a second "Allow" button at the top of the screen in a grey menu bar if you are using the Chrome Browser.  Internet Explorer will sometimes request permission with an option at the bottom of the browser window.

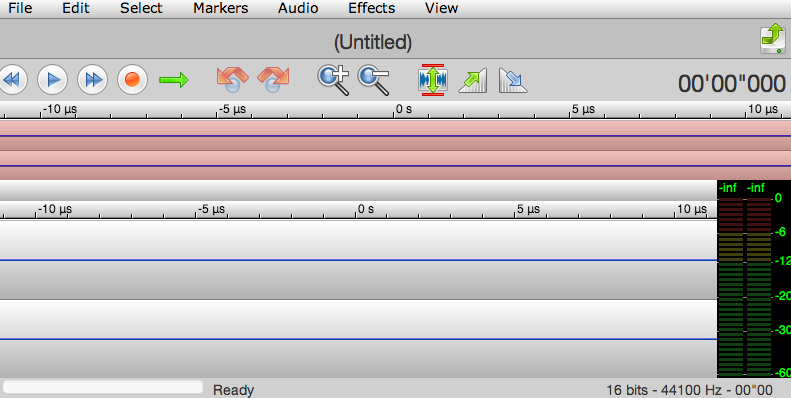
The audio recording screen will now appear active on your screen.  The rewind, pause, forward, and record buttons are now available for you to begin recording.


You will find with a little practice that students can also quickly delete and re-record their audio tracks using the "Control+A" keyboard shortcuts and Delete keys much faster than closing and reopening this audio window.

When you have an audio track that you are ready to save, simply click "File" and make a selection as to how you'd like to save your file.  Note that you can even send the audio file straight to Google Drive!


Without an account students can only save an audio track up to 30 seconds long.  If you need to create longer clips then you will first need to set up a free TwistedWave account with your email.  Students can set up free accounts with their @csdddocs.org student email (The student Gmail feature is only available for students in grades 6 and up in the Canyons School District).

For more tips and tricks on using TwistedWave or installing the TwistedWave bookmarklet in your Chrome bookmarks bar, check out https://twistedwave.com/online/

Tuesday, March 25, 2014

Save Money with RetailMeNot

Whenever I shop for home or school, I always check the Retail Me Not iPhone app or website for discount codes to stretch a dollar.  Depending on the store, coupon codes are available for in-person and/or online shopping.   Start saving today!


MacX YouTube Downloader


MacX YouTube Downloader is a quick and easy way to convert videos from YouTube so you can embed the videos for instructional use.  This short tutorial shows how to convert a YouTube video to then embed it into a PowerPoint.  It is important to remember copyright rules and laws when using videos that are not yours. Visit ProLearning for more information on Copyright Information at ProLearning. To download MacX YouTube Downloader, visit: http://www.macxdvd.com/free-youtube-video-downloader-mac/.

Friday, March 21, 2014

Projecting your iPad...What Are Your Options?

About four years ago, I was teaching 5th grade.  I was given an iPad to use with my students.  I spent several hours researching ways I could use this amazing new device with my class of 30 kids.  It was the new iPad 2 that had just come out in stores.  There was an amazing rear camera and this new feature I would learn about called Airplay.  I discovered that the new version of the Apple TV had just come out and would mirror the iPad onto a television or other HDMI compatible device.  I had a VGA projector in my classroom, and would need a converter to get it to work.  My principal purchased this equipment with the understanding that I wasn't sure it was going to work.  It did work, so for about $140 in equipment I could project my iPad for my class wirelessly.

Airplay symbol
Today, there are many more less expensive options that utilize Airplay on an iPad.  Teachers are using iPads as a remote mouse and annotation tool in concert with the computer (Doceri) as well as using the ever developing catalog of apps that support curriculum through mirroring.  There are more options than ever for projecting your iPad.  The less expensive options involve projecting your iPad to your computer that is connected to the projector.  The Apple TV offers a solution absent of a computer.  Check out these options to see which one fits your current classroom situation!

Reflector-$12.99
AirServer -$14.99 (bulk pricing is available)
Apple TV- $99

Wednesday, March 19, 2014

WebRangers- Making History Engaging!

The National Park Service has created an interactive website for kids of all ages (specifically K-8) to explore U.S. history. It is called WebRangers. A child can discover interesting historical facts by engaging in activities related to the national parks, monuments, and historical sites.  With over 60 activities in 7 different categories, students are bound to find a part of history that excites them.
 
A student can view activities as a guest, or for a more customized experience, they can create their own personal WebRanger account.  The WebRanger account allows the child to create a personalized ranger station, track their progress, and even earn badges.  The activities range in ability level, show movie clips, provide hands-on activities, and have assess the student’s knowledge.

For teacher’s, there is a WebRangers Teachers’ Resoure Guide.  The guide outlines the activities and shows which standard/s they apply to in the Common Core.

WebRangers could be used as a whole class activity, a station, or simply as a fast finisher. No matter how it is used, it is sure to create a fun, interactive environment for the students, and is a safe, reliable source.     

Become a WebRanger today at: http://www.nps.gov/webrangers/


forScore App

This post is for all you musicians out there. One of my most frequently used apps on my iPad is forScore. This app manages all your sheet music, making your music rehearsals, performances, and teaching much easier. The forScore website describes it perfectly:
"Shelve those 3-ring binders. Get organized. Download and play something new in seconds. With forScore, your sheet music has never been better -- it's everything you can do with paper, and so much more."
ForScore allows you to import pdf files of sheet music. Once the music is imported, you can annotate it with a number of different pens. You can create set lists to manage your music. You have access to a metronome, piano keyboard, and pitch pipe to help you rehearse. ForScore can even be paired with a page turner to help those instrumentalists who need to use their hands to play. This is only a small list of this app's capabilities.

The forScore app quickly became my favorite music app. It costs $6.99 in the Apple iTunes Apps Store. Give it a try!

Tuesday, March 18, 2014

Turn your iPad into a Document Camera

For about $45 you can purchase an iPad stand that will allow you to use your iPad as a document camera. You can use the Camera app to show work to students just as you would any document camera. Or you can use an app like Stage to record and annotate over live images captures with the camera on the iPad.
When you pair this stand with AirPlay or AppleTV, you can project these images to your students in class.

This iPad stand can be moved around your room to a lecture stand or a student desk. That way you can teach from any location in your classroom and share your own images, student work, or have students share ideas with the whole class.

Monday, March 17, 2014

Stick Around

Stick Around is a fabulous new app by the creators of Explain Everything. This app allows you to play, design and share customized puzzles. The app comes with several preprogramed puzzles and lots of templates to help you start creating your own puzzles. This app can be used for any subject matter. Your puzzles will be as creative as you make them! Students love this app and the self checking feature.

Share the puzzles you create with students via QR code, Google Drive, Dropbox...and many other ways! Check out the video below for an idea of what Stick Around can do for you!

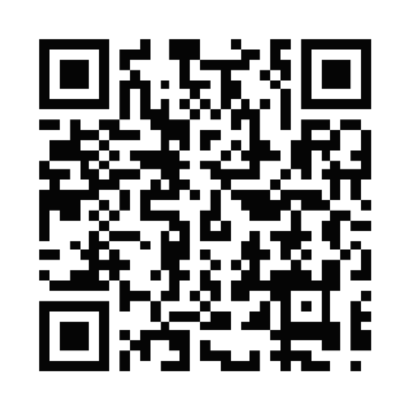
I used Stick Around with a 4th grade class at Altara Elementary this week.  I linked the puzzles in I made in Stick Around to QR codes and placed those QR codes around the classroom.  The students used iPad minis to scan the QR code and open the puzzles.  After solving one puzzle they would find the next QR code, scan it, and solve the next puzzle.  This activity was self guided and self paced.  The students loved it!  It was a great way to review concepts they learned throughout the year and ask questions when they needed help.  You can scan the QR codes below for a sample of the puzzles I created.


Friday, March 14, 2014

Stopping Your Computer Going to Sleep has Never Been Easier: Caffeine Anyone?

Every teacher has experienced their computer going to sleep or screen saver in the middle of a presentation.  While there are ways to change your settings to a longer idle time before your computer goes to sleep, there is a much easier way.

With a creatively punned name, Caffeine, a free app (software) for your Mac computer, allows you to decide when you want your computer to stay awake.  Once installed, Caffeine will be installed in the menu bar (Image below).  To download, go to the App Store icon and search for “Caffeine" (Image right).

Like a cup of coffee, when Caffeine is activated by clicking on the “cup,” your computer will stay awake.  By clicking on the “cup” it will fill with coffee and when you click the icon again the coffee will be gone.

Caffeine as a great productivity tool for any teacher who presents to their students.  Don’t forget to empty the cup… 


Wednesday, March 12, 2014

Guided Access for iPads: A MUST for ALL Teachers


Okay Teachers, look no further!  Guided Access is an iOS feature that will blow your mind!  It allows you to lock your iPad into a specific app.  This not only keeps the younger students from getting frustrated every time they click the home button and don’t know how to reenter an app, but it also keeps the older students on task and out of trouble.  What a novel idea!

This feature is very simple to enable. 
Just follow these steps:

Turn on Guided Access in Settings
  1. Go to Settings
  2. Tap on General.
  3. Tap on Accessibility.
  4. Under Learning, Tap on Guided Access.
  5. Turn Guided Access On.
  6. Tap Set Passcode and create a 4-digit passcode.
Enable Guided Access in the App
  1. Click on your home button and enter the app you want the student to use.
  2. Triple Click the Home Button.
  3. Under the Hardware Buttons Options, you can choose whether you want the Sleep/Wake Button and the Volume Buttons to be enabled. 
  4. You can also choose whether you want Touch and Motion to be enabled.
  5. Circle areas on the screen you would like to disable.
  6.  Click Start in the top right hand corner.

Disable Guided Access in the App
  1. Triple Click the Home Button.
  2. Enter Passcode.
  3. Hit your home button to exit the app.

*If you do not turn off Guided Access in the Settings after use, you can Triple Click the home button to renter Guided Access Mode.  It may ask you to set the password upon entering.


For a video tutorial visit: http://youtu.be/FRTNiCnC-nw